
How to Do a Hanging Indent on Google Docs: Easy Formatting Tutorial!
Formatting matters in all forms of content, whether you are a professional or a student. With the help of the hanging indent, it is possible on Google Docs. Moreover, if you are using Google Docs, you’ll get two options to do that.
First option is to choose the text you want to hang indent and then move towards the Format menu. Next, go to Align & Indent. From the drop-down option, go for Indentation options. Choose Hanging by mentioning 0.5 inches. Lastly, click Apply.
And the second option is using the ruler. In this case, you need to drag the ruler from the left indent marker to the right side. Moreover, drag the first marker so that it can combine.
This how-to guide will define both methods in a comprehensive form, so that your Google Docs can effortlessly maintain the professionalism and credibility of your work.
Summary of Core Concepts!
- The first sentence of Google Docs will be indented with the following lines.
- Mostly required in both citation styles, MLA and APA.
- Select the text > Format menu > Align & Indent > Indentation options > Hanging > Apply.
- Ideal for a professional report, an academic paper, or any type of document that requires a clean reference.
- Customize the hanging indent as per convenience.
- If the ruler is not showing, you can see it under the View Option to tap on Show Ruler.
- Consider using Alt + O + A + O to reach the Hanging Indent option instantly.
What Is a Hanging Indent?
In Google Docs, there is a feature where users can easily maintain the formatting level the way he/she wants it to look in their Google Docs. Moreover, all the lines of the content are fully indented with the first paragraph of the content.
Most importantly, this hanging indent is famous and used in vitiated pages and bibliographies. It is beneficial to know the difference between entries. Each line is converted inward by 0.5 inches in Google Docs.
Why Use Hanging Indents?
There are various use cases of hanging indents, such as in reference sites, formatting, and much more. Going through the upcoming section will let you know about them in detail.
- Reference Lists: Individuals who follow the academic style need them to be separated clearly and note down the specific citations. In other phrases, your first line will be started from the margin, and then the other lines will be indented.
- Block quotes: When a user is using a block quote in their Google Docs, the specific quote will look totally different from the remaining content. In short, the particular quote part will be highlighted separately.
- Complex Lists: While mentioning bullets or numbers in the content, sometimes, text may overlap and make the content messy. By using hanging indents, your lines will be set neatly under your first line and not come under the bullets you mentioned.
- Professional Formatting: Content should be framed professionally, even if you have to submit your assignments. With the help of hanging indents, you can effortlessly do it.
How to Do a Hanging Indent on Google Docs?
Google Docs has various built-in tools that help users create a hanging indent. Check out all the methods here, as we are going to describe each of them
Steps for Desktop (Browser Version)
Understand these steps that will help you to create perfect formatting on Google Docs with the help of the hanging indent on any web browser.
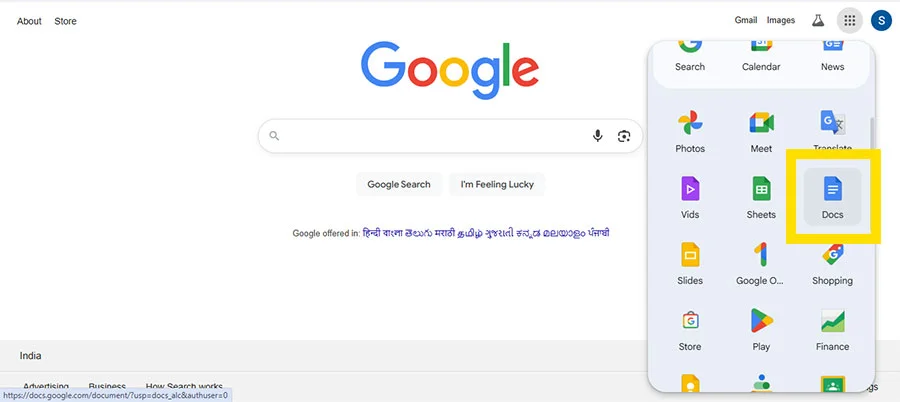
- Open your web browser and go to Google Docs.
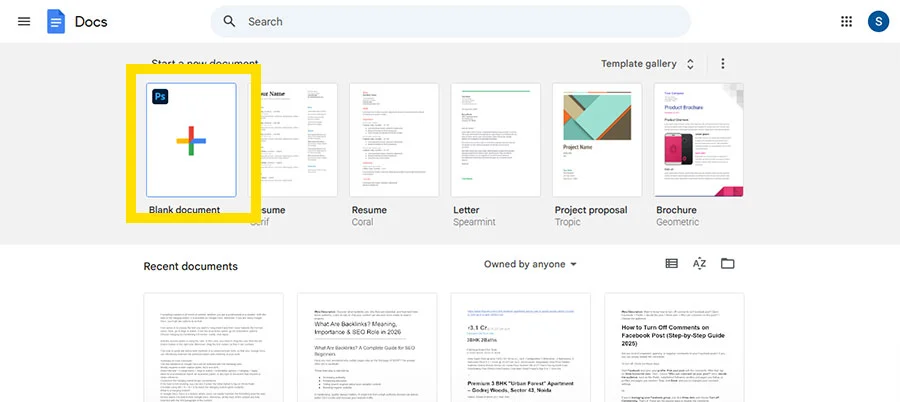
- Create a new document or open an existing one where you want to add content.
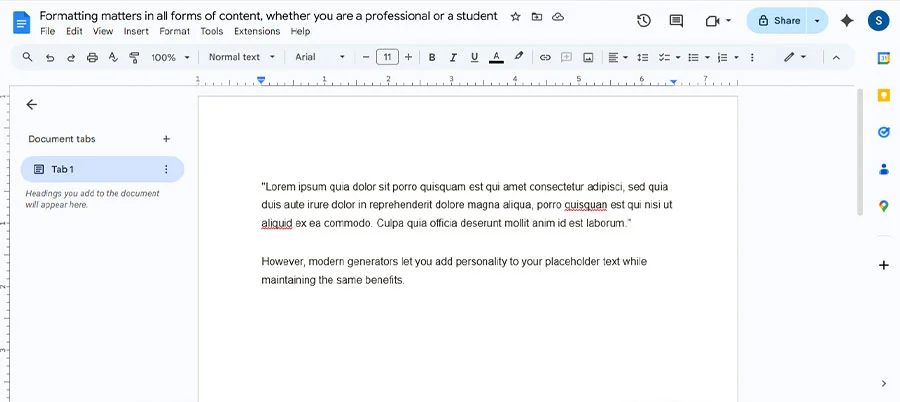
- Type down the content, whatever you want to.
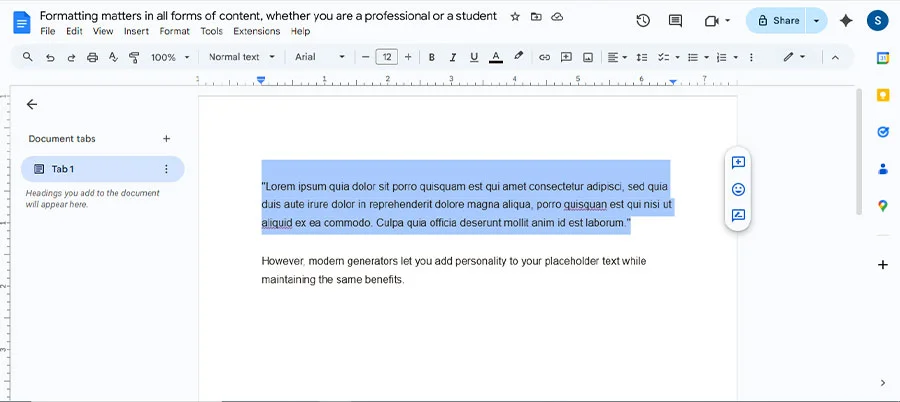
- Choose the text you are willing to apply a hanging indent to.
- Move to the Format menu.
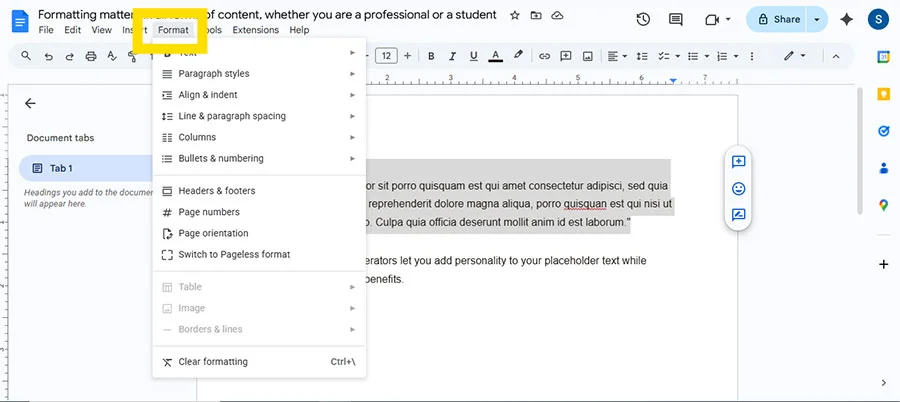
- Choose Align & Indent.
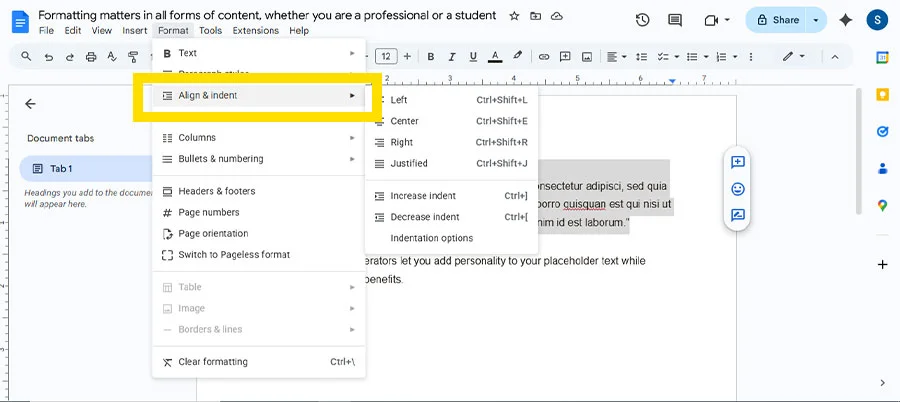
- You will see a drop-down menu.
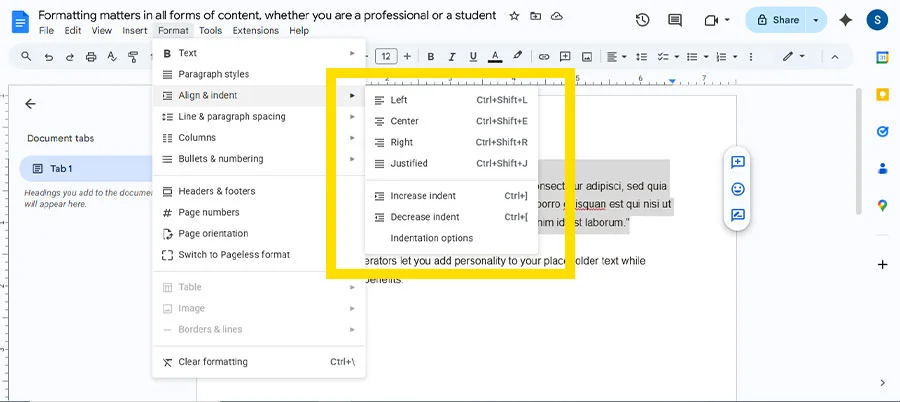
- Opt for an Indentation option.
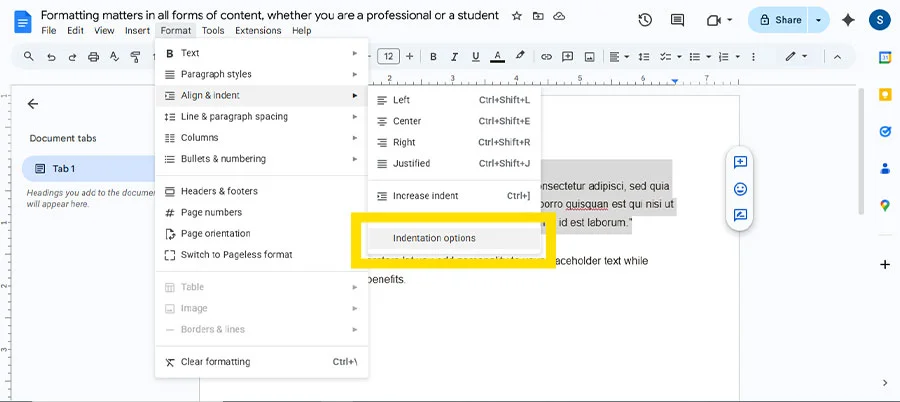
- Go for the Special Indent.
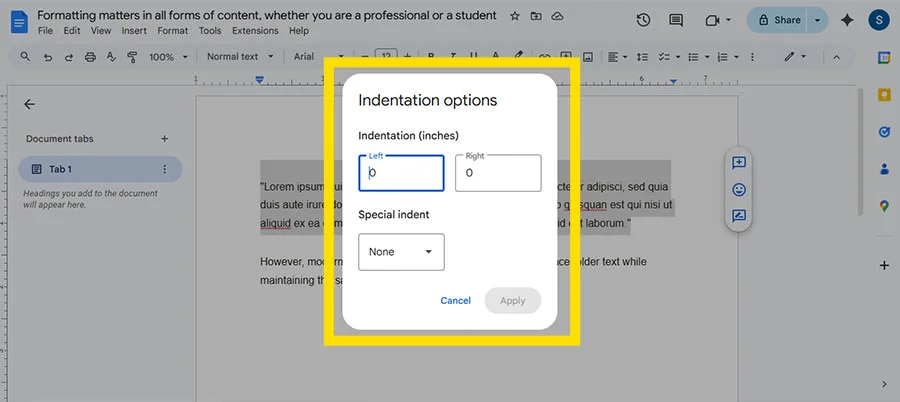
- Tap on Hanging and make sure to type down 0.5.
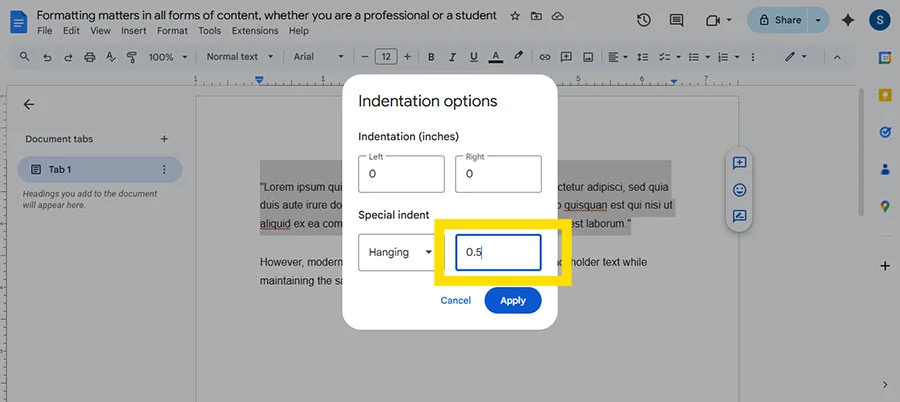
- Lastly, tap on Apply.

Note: If you want to go directly to the Indentation option, simply use these keys— Alt + O, then A, then O.
Using the Ruler Tool for Hanging Indents
This method will use the drag-and-drop option with the help of the ruler tool.
- Open Google Docs.
If you are seeing that the ruler is not accessible on your screen, you need to turn it on first. To do so, tap on View and then Show Ruler.
- Now, on your Docs, you will be able to see the ruler.
- To make the content fit properly, click on the small blue triangle so that the other lines, except the first sentence, will be shifted to the right-hand side.
- Now you can see that the hanging indent has been created in your Google Docs.
How to Create a Hanging Indent on Google Docs Mobile?
These are the following instructions that will help you to do a hanging indent on your mobile device. In addition, this method works well on both devices, Android and iPhone.
Important Note:
If you get stuck, which approach is more suitable for you? Read the following key notes.
- Method 1: Using the mobile-based version: If you’re preparing the bibliography or a list, as well as you don’t want to change the text, go for this approach.
- Method 2: Using the desktop-based version: While writing the long academic paper, you make sure that the formatting has been done perfectly. In this case, this approach will be beneficial for you.
Now, let’s discuss the walkthroughs.
- Download Google Docs from the Store.
- Open it and type down the paragraph.
- Then, separate your first line from the rest of the content.
- Now, tap on the A icon.
- You’ll see a Format menu open on your screen.
- Scroll down a bit. Find 6 icons in a row.
- Opt for the last icon in that row.
- After tapping on it, you’ve done a hanging indent.
How to Remove a Hanging Indent?
These are the steps that will help you to remove a hanging indent on your Google Docs.
- Start using Google Docs.
- Choose the specific part of the content or any paragraph.
- Now, you need to drag the small blue triangle to the left side till it meets the margin.
Check whether the content is appropriately suited to the remaining paragraphs.
Alternatively, you can also opt for the Align & Indent option.
- Follow 1-2 steps here as well.
- Tap on the Format toolbar’s icon.
- Look for Align & Indent. Click on it.
- Click Indentation options.
- Set indentation to 0 to undo the hanging indent.
- Lastly, opt for Apply.
Quick Tips
Before proceeding further, you must have a look over these smart and advanced tips so that you can make your formatting more engaging and faster.
- Use the ruler tool effectively. Tap on the blue triangle very carefully to create a hanging indent.
- Consider using [Ctrl + Space] to remove the additional and unnecessary formatting.
- Make sure that you are performing the right method as per your writing citations.
- Sometimes, indents keep coming up back-to-back. Reset your paragraph styles.
- Don’t use the Tab key to create a hanging indent on your Docs.
Hanging Indent vs First-Line Indent
While both are types of indentations, knowing the difference between them will help you to know which one is more beneficial.
| Feature | Hanging Indent | First-Line Indent |
| Definition | The first line maintains at the margin; the following lines are indented. | The first line is indented; the following lines align with the margin. |
| Appearance | Text looks like it “hangs” under the first line. | First line steps in; the rest stays flush left. |
| Common Use | Bibliographies, reference lists, block quotes. | Standard paragraphs in essays, books, and articles. |
| Purpose | Separates items visually and improves readability in lists. | Signals the start of a new paragraph. |
| Formatting Style | Indentation applies to all lines except the first. | Indentation applies only to the first line. |
Mostly Asked Queries And Their Solutions
Want to know more about hanging indents on Google Docs? Don’t worry at all! We’ve compiled all the important questions so that all your doubts can be cleared.
Q1. What is the shortcut for hanging indent in Google Docs?
Ans. Press the Alt+O+A+O keys to reach to the indentation section effectively in Google Docs.
Q2. Can I apply a hanging indent to multiple citations at once?
Ans. Yes! You can effortlessly apply a hanging indent to numerous citations at once. You just need to choose the entire section to do so.
Q3. Why is the indent too large or too small?
Ans. It is all because you may have chosen the default paragraph style, or there may be some wrong margin settings. Another case can also occur where you may change the ruler’s indent markers.
Q4. Does Google Docs mobile allow hanging indents?
Ans. YES! For mobile users, Google Docs allows users to use hanging indents by choosing the Special indent option. You’ll get this choice under the paragraph formatting menu.
Q5. How do I apply hanging indents automatically?
Ans. You need to move towards Format and then Align & Indent. Next, choose Indentation Options. Now, tap on Special Indent to select Hanging.
Q6. What is a proper hanging indent?
Ans. Proper hanging indent means that the first line of the content should align with the margin of Google Docs.
Q7. Is there a command for hanging indent?
Ans. Unfortunately, there is no specific command that can be used in Google Docs for hanging indent.
Q8. Why can’t I indent the second line in Google Docs?
Ans. Sometimes, users try to indent the entire paragraph without using the hanging indent. That’s why users are not allowed to indent the second line.
Final Thoughts!
Hanging Indent can be done in just a few clicks. But make sure you are putting your full confidence while using the ruler method. However, it is very necessary to drag only the small blue triangle. Otherwise, it may lead you to damage the formatting of your content.
In the above guide, we have prepared all the methods and provided you with the option of which one you have to choose. First of all, it totally depends on your writing style. After that, opt for that approach.
Reference Links:-
https://www.youtube.com/watch?v=IasdzXmEb6s
https://support.google.com/docs/thread/6177910/how-do-i-get-hanging-indents-in-google-docs?hl=en
https://www.reddit.com/r/googledocs/comments/1nk7k32/how_to_do_hanging_indent_on_google_docs/